Unity Dungeon Crawler 3d Kit (Gridder)
A downloadable asset pack
Unity package for starting a gridder style dungeon crawler.
Includes:
- level editor
- player
- shaders for wall, floor, and ceiling
This is very basic and intended to help someone new to Unity get started.
Tested with Unity 6.3 and URP.
Download
Install instructions
How to Use DungeonStarter
This guide will walk you through the process of creating a new dungeon level from scratch, setting up the player, and applying materials.
Step 1: Create the Core Assets
Before building a level, you need to create the ScriptableObject that will hold the reference to your active level.
- Create the Level Variable: In the Project window, right-click and navigate to Create > DungeonStarter > Variables > Current Level.
- Name this new asset something memorable, like
Var_CurrentLevel. This asset will act as a global pointer to whatever level is currently being played.
Step 2: Design Your Dungeon Layout
- Open the Level Editor: In the Unity menu bar, go to DungeonStarter > Level Editor.
- Create New Level Data: The editor window will be empty. Click the "Create New Level Data" button.
- Save the Asset: A save dialog will appear. Name your new level (e.g.,
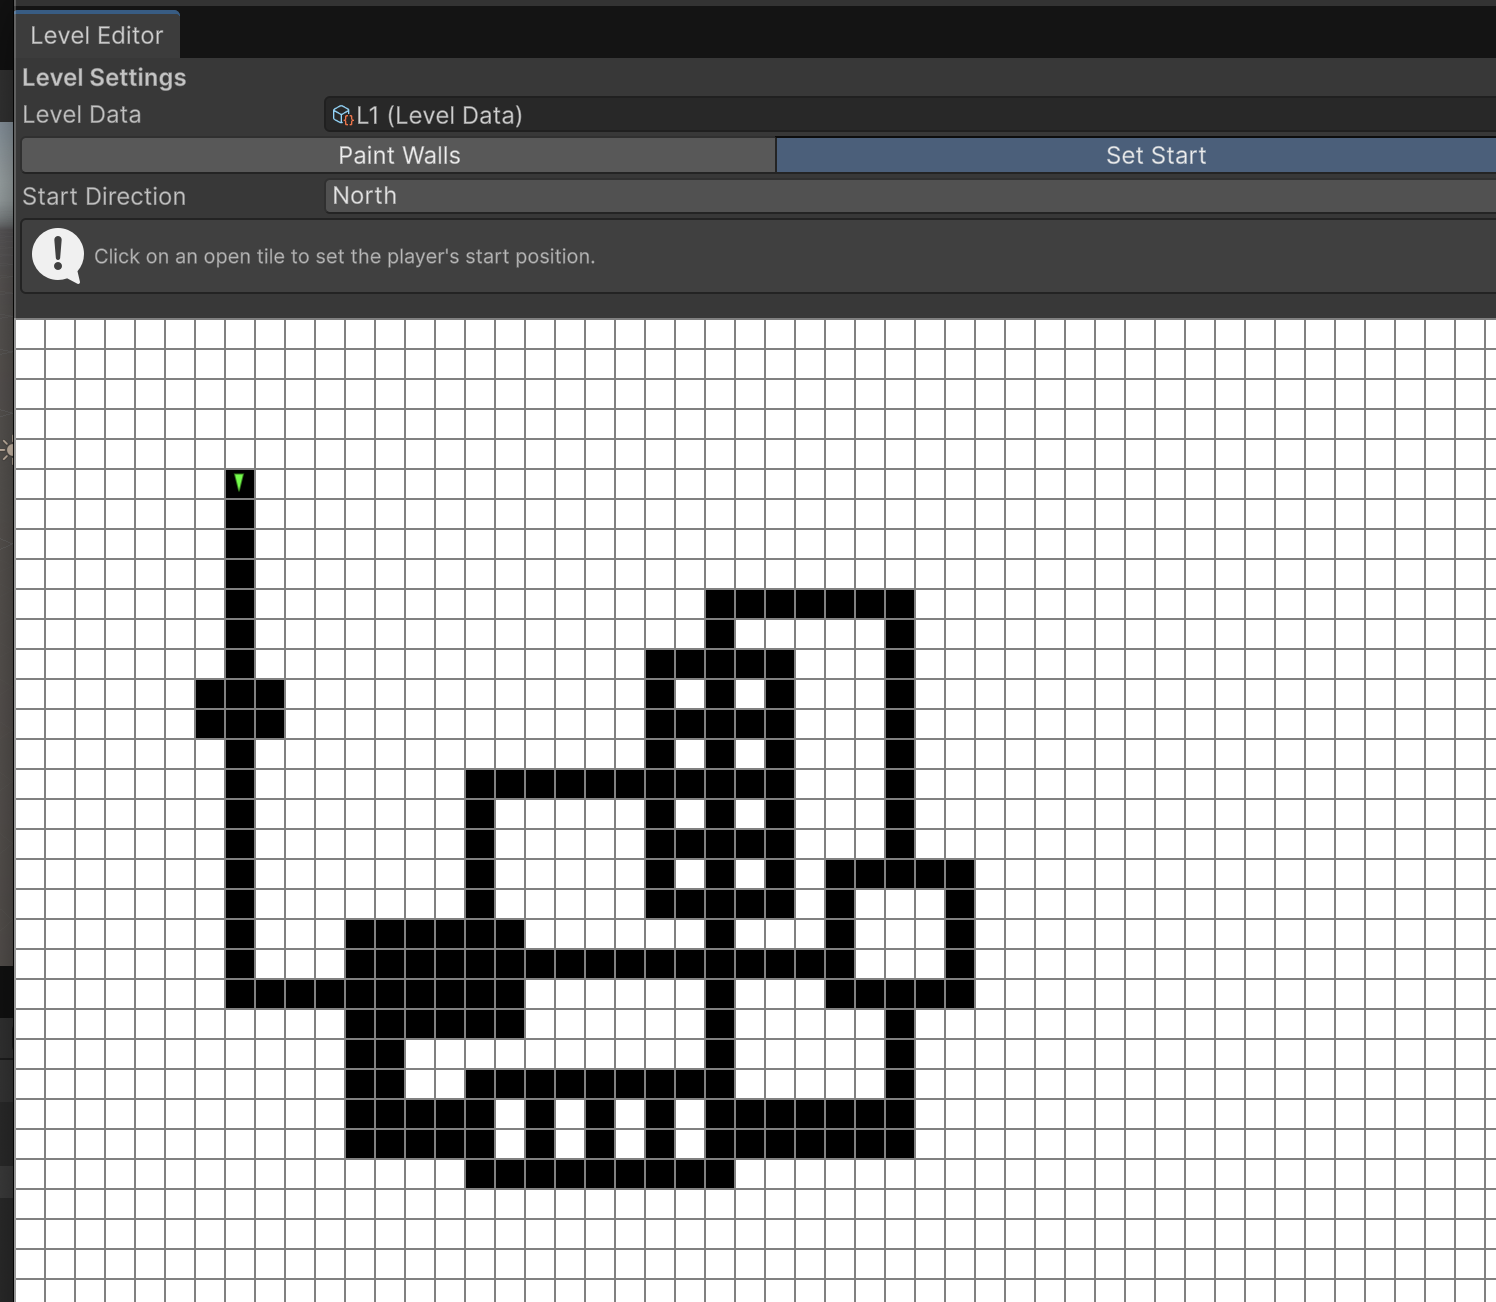
Level_01_Crypt) and save it. The editor will now display a 50x50 grid of solid white (walls). - Paint Your Dungeon:
- Ensure you are in "Paint Walls" mode (the default).
- Left-click and drag to carve out your hallways and rooms. These will appear as black squares.
- Right-click and drag to fill areas back in with walls.
- Set the Player Start:
- Switch to "Set Start" mode using the toolbar at the top of the editor.
- Choose a Start Direction from the dropdown menu.
- Click on any open (black) tile in your grid. A green arrow will appear, marking the player's spawn point and orientation.
- Your
LevelDataasset is now saved and ready to be used.
Step 3: Build the Level in the Scene
- Create a Level Manager: In your scene, create an empty GameObject and name it "LevelManager".
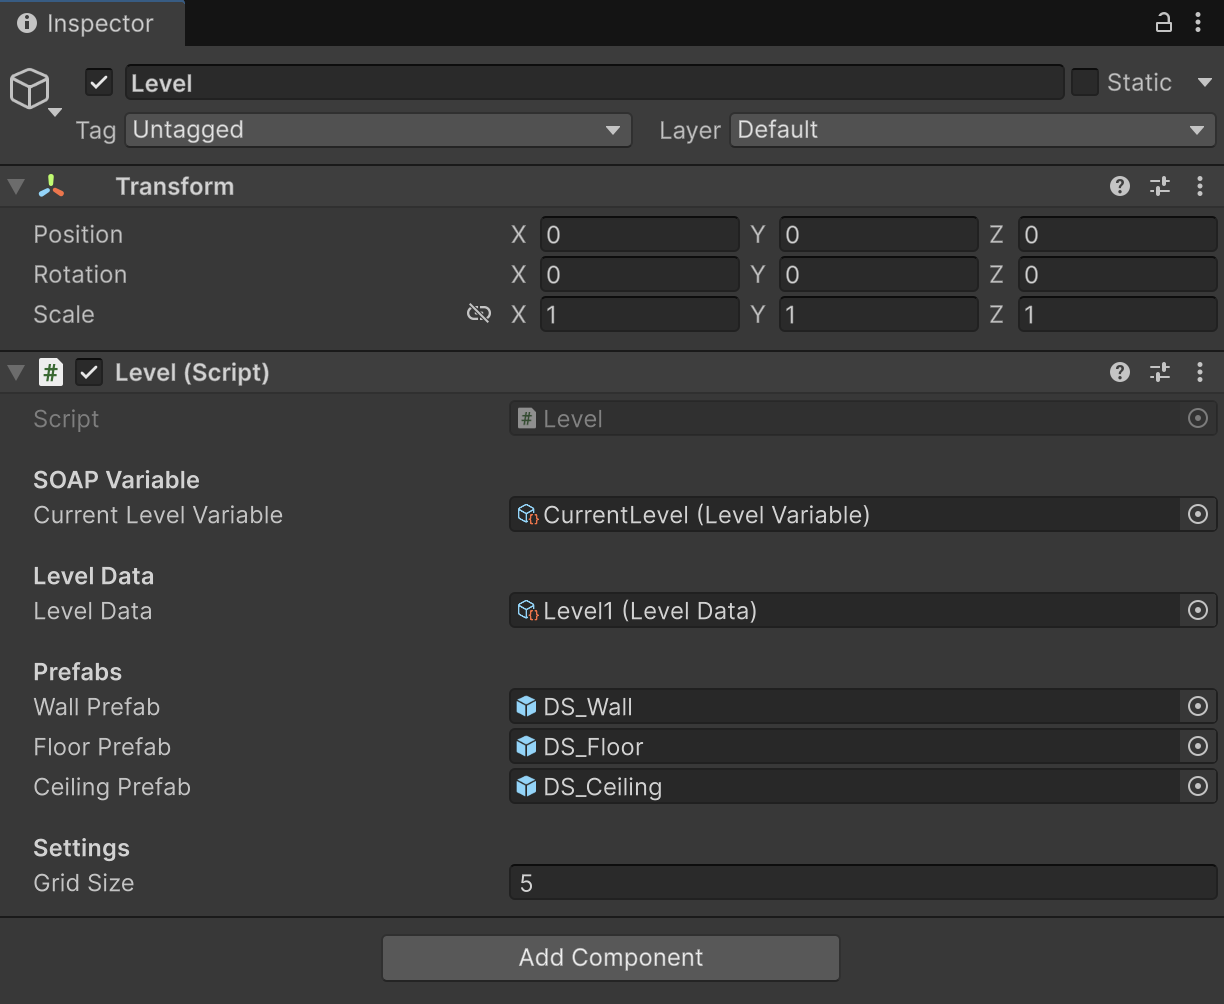
- Add the Level Component: Add the
DungeonStarter/Levelcomponent to your LevelManager object. - Assign Assets:
- Drag your
LevelDataasset (e.g.,Level_01_Crypt) into the Level Data slot. - Drag your
Var_CurrentLevelasset into the Current Level Variable slot. - Create and assign your Wall, Floor, and Ceiling prefabs. These can be simple cubes for now.
- Drag your
- Generate the Geometry: Right-click the
Levelcomponent in the Inspector and choose "Generate Level". The 3D representation of your dungeon will appear in the scene, neatly organized.- Alternatively, with the LevelManager selected, use the DungeonStarter > Generate Selected Level menu item.
Step 4: Set Up the Player
- Create the Player Object: Create a new empty GameObject named "Player". Add a Camera to it so you can see.
- Add the Player Component: Add the
DungeonStarter/Playercomponent to your Player object. - Assign the Level Variable: Drag your
Var_CurrentLevelasset into the Current Level Variable slot on the Player component. - Press Play! The player will automatically find the start position from the
LevelDataand you can move around using the WASD/QE keys.
Step 5: Apply Shaders and Materials
- Create Materials: Create new materials for your walls, floors, and ceilings (e.g.,
M_BrickWall,M_StoneFloor). - Assign Shaders: Select a material, and in the Inspector's shader dropdown, choose one of the
DungeonStartershaders (e.g.,DungeonStarter/Brick Pattern). - Configure Materials: Adjust the colors, tiling, and other properties on each material to achieve your desired look.
- Apply to Prefabs: Apply these configured materials to your Wall, Floor, and Ceiling prefabs.
- Re-Generate: If you generate your level again, it will now be built using your styled prefabs.
Development log

Leave a comment
Log in with itch.io to leave a comment.